According to AAA, over 90% of modern vehicles on the road today have Anti-lock Braking Systems, yet only a fraction of DIY mechanics have access to professional grade scan tools needed to service them.
Faced with spongy brake pedal syndrome from air trapped in your ABS module? You're not alone, and you're not helpless.
The brake pedal is literally your vehicle's lifeline. When it feels soft or spongy, your safety is compromised. While dealerships might charge $150+ for an ABS bleed service, I'm about to show you how to tackle this job in your own garage with basic tools and some mechanical patience.
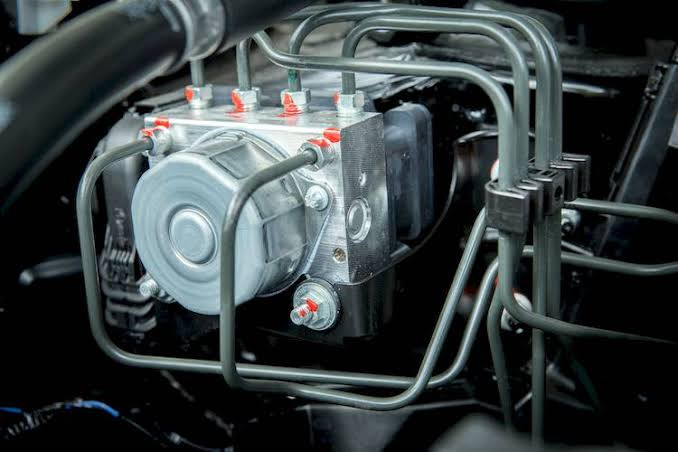
Understanding Why ABS Systems Are Different
Your vehicle's Anti-lock Braking System isn't just a simple hydraulic system like older brakes. It contains a computer like module with valves, pumps, and solenoids that actively control brake pressure during emergency stops. When air gets trapped inside these components, traditional bleeding methods often fall short.
The challenge is that these valves normally remain closed unless electronically activated, creating pockets where air can hide indefinitely. While professional shops use expensive scan tools to cycle these valves open during bleeding, you can achieve similar results with some clever techniques.
Signs You Have Air in Your ABS Module
Before diving into the procedure, confirm that air in the ABS module is indeed your problem. Look for these telltale symptoms:
- Spongy or soft brake pedal even after conventional bleeding
- ABS light illuminated on your dashboard
- Unusual pulsing sensation when braking normally
- Reduced braking performance despite new brake components
- Pedal gradually sinks to the floor when held down
If you're experiencing these symptoms after recent brake work or fluid loss, trapped air is likely the cause.
Method 1: The Dynamic Activation Method (Road Test Method)
Why This Method Works:
Tools You'll Need:
- Floor jack and jack stands (rated for your vehicle's weight)
- Wheel chocks for safety
- 14mm or appropriate size wrench for your bleeder screws
- Clear vinyl tubing (⅛" or 3/16" inside diameter), about 2 feet per corner
- Clean catch containers (small jars work well)
- Fresh DOT approved brake fluid specific to your vehicle
- Clean rags or shop towels
- Brake fluid waste container
- Helper (optional but recommended)
Detailed Step by Step Procedure:
1. Safety Preparation (15 minutes)
- Park on a completely level surface
- Apply parking brake firmly and chock wheels that will remain on the ground
- Loosen wheel lug nuts slightly before jacking (but don't remove)
- Jack up the vehicle and secure it properly on jack stands at manufacturer recommended lifting points
- Double-check stability before proceeding
- Remove wheels for better access to brake components
2. Initial Conventional Bleeding (30 - 45 minutes)
- Check your vehicle's service manual for the correct bleeding sequence (typically right rear, left rear, right front, left front)
- Clean all bleeder screws with brake cleaner to remove dirt that could contaminate the system
- Fill the master cylinder reservoir to the "MAX" line with fresh fluid
- Place one end of clear tubing over the bleeder screw and the other in a container partially filled with brake fluid (this prevents air from being sucked back in)
- Have a helper slowly press the brake pedal to the floor
- While the pedal is held down, open the bleeder screw ¼ turn
- Watch for fluid and air bubbles flowing into the container
- Close the bleeder screw before your helper releases the brake pedal
- Repeat 5 - 8 times per corner until no air bubbles appear
- Top up master cylinder after each wheel to prevent it from running dry
- Complete all four corners in the proper sequence
3. ABS Activation Setup (15 minutes)
- Lower the vehicle from the jack stands until tires make light contact with the ground
- For some vehicles, you may need to leave the rear wheels elevated with the drive wheels on the ground
- Ensure there's enough clearance for wheels to spin but maintain stability
- Verify the master cylinder is topped up with fluid
- Confirm parking brake is released for this step
4. Controlled ABS Activation (15 minutes)
- Drive to a safe, open area like an empty parking lot
- Find a surface with reduced traction if possible (gravel, wet pavement, or loose dirt)
- Accelerate to approximately 15 - 20 mph
- Apply the brakes firmly but not violently
- You should feel the characteristic pulsing through the brake pedal when ABS activates
- The pedal will vibrate and may make a grinding or buzzing noise, this is normal ABS operation
- Repeat this process 5 - 10 times with brief cooling periods between attempts
- This cycling process forces the ABS valves open, allowing trapped air to move through the system
5. Visual Confirmation and Secondary Bleeding (30 minutes)
- Return vehicle to jack stands
- Check master cylinder level and top up if needed
- Repeat the conventional bleeding procedure on all four corners
- Pay careful attention to the clear tubing, you should now see air bubbles that were previously trapped
- Continue bleeding each corner until no more bubbles appear
6. Testing Brake Pedal Feel (5 minutes)
- After completing the bleed, lower the vehicle completely
- With engine off, press the brake pedal firmly
- It should feel solid with minimal travel before resistance
- If the pedal still feels soft or spongy, repeat the ABS activation and bleeding process
- A successful bleed results in a firm, responsive pedal that maintains pressure
Common Problems and Solutions:
- Pedal still soft after multiple bleeding attempts: Your ABS may not have fully activated. Try more aggressive braking on a looser surface.
- No fluid flowing during bleeding: Check if bleeder screw is clogged or corroded. Clean or replace if necessary.
- Dirty fluid appearing: Continue bleeding until clean fluid appears. This indicates old fluid is being purged.
Method 2: The Extended Gravity Bleeding Method
Why This Method Works:
Tools You'll Need:
- Floor jack and jack stands
- Wheel chocks
- Appropriate size wrench for bleeder screws
- Clear vinyl tubing (⅛" or 3/16" inside diameter)
- Clean catch containers
- Fresh brake fluid
- Clean rags
- Flashlight (for better visibility)
Detailed Step by Step Procedure:
1. Position Setup (20 minutes)
- Park on a level surface or with a slight incline so the front of the vehicle is higher than the rear
- For maximum effectiveness, use ramps for the front wheels to elevate the master cylinder further
- Secure vehicle properly with wheel chocks and jack stands as needed
- Remove the wheels for better access
- Remove the master cylinder cap and fill to absolute maximum (slightly above the "MAX" line)
- Leave the reservoir cap off to eliminate any vacuum effect
2. Prepare Each Bleeder (5 minutes per corner)
- Locate all bleeder screws on each brake caliper or wheel cylinder
- Thoroughly clean each bleeder with brake cleaner and a wire brush if necessary
- Attach a clear tube to the bleeder and place the other end in a container partially filled with fresh brake fluid
- The end of the tube must remain submerged in fluid to prevent air from reentering the system
3. Extended Bleeding Process (25 - 40 minutes per corner)
- Starting with the wheel furthest from the master cylinder (usually right rear):
- Open the bleeder screw slowly (typically ½ to 1 full turn)
- Watch for fluid to begin flowing through the tube, this may take several minutes
- Allow fluid to flow continuously for at least 15 minutes
- Watch carefully for air bubbles in the clear tube
- Initially, you may see a steady stream of bubbles that gradually decreases
- Periodically check and refill the master cylinder as needed
- Visual Indicator of Success: When no new air bubbles have appeared for 3 - 5 minutes, that corner is likely bled
4. Strategic Agitation (5 minutes per corner)
- While the bleeder is open and fluid is flowing:
- Gently tap along brake lines and components with a plastic or rubber mallet
- This vibration helps dislodge stubborn air bubbles clinging to internal surfaces
- Pay special attention to high points in the lines where air can collect
- Visual Indicator of Success: After tapping, you may see new bubbles emerge then gradually stop
5. Sequential Bleeding (80 - 160 minutes total)
- After completing one corner, close the bleeder screw and move to the next in sequence
- Follow the proper bleeding order (typically right rear → left rear → right front → left front)
- Between corners, check and top off master cylinder fluid
- After all corners are bled, allow the vehicle to sit for 30 minutes
- Repeat the entire process once more for thoroughness
- Visual Indicator of Success: The second round of bleeding should produce few or no air bubbles
6. Pedal Testing (5 minutes)
- Replace master cylinder cap and reinstall wheels
- Lower vehicle from jack stands
- With engine off, slowly press the brake pedal
- The pedal should feel firm with minimal travel
- Visual Indicator of Success: Pedal holds pressure without sinking when held down for 30+ seconds
Common Problems and Solutions:
- Little or no flow: The bleeder may be partially clogged. Close it, clean it, and try again.
- Flow stops completely: Check master cylinder level and refill if needed.
- Continuous air bubbles: Your system may have a leak. Inspect all brake lines and fittings.
- Pedal still soft: Gravity bleeding may not have activated ABS valves. Try Method 1 or Method 3.
Method 3: The Vacuum Assist Method
Why This Method Works:
Tools You'll Need:
- Manual vacuum pump with brake bleeder adapter (available at auto parts stores for $30 - 60)
- Floor jack and jack stands
- Wheel chocks
- Appropriate size wrench for bleeder screws
- Clean catch container attached to vacuum pump
- Fresh brake fluid
- Clean rags
Detailed Step by Step Procedure:
1. Vehicle Preparation (15 minutes)
- Park on a level surface
- Secure vehicle with wheel chocks
- Jack up vehicle and support with properly positioned jack stands
- Remove wheels for better access
- Fill master cylinder to the "MAX" line with fresh fluid
- Keep the reservoir cap on but loosened (1/4 turn) to allow air entry but prevent splashing
2. Vacuum Pump Setup (5 minutes)
- Assemble your vacuum brake bleeder according to manufacturer's instructions
- Select the appropriate adapter for your bleeder screws
- Ensure all connections are tight to maintain vacuum
- Test the pump operation before connecting to the vehicle
3. Bleeding Process (10 - 15 minutes per corner)
- Starting with the furthest wheel from the master cylinder:
- Clean the bleeder screw thoroughly
- Attach the vacuum pump adapter to the bleeder screw
- Create a tight seal around the bleeder
- Pump the vacuum tool to create 15-20 inHg (inches of mercury) of vacuum
- Slowly open the bleeder screw (typically 1/4 to 1/2 turn)
- Watch fluid draw through the clear tube into the collection container
- Visual Indicator of Success: Initial fluid may contain air bubbles, but should eventually run clear
4. Thorough Extraction (5 - 10 minutes per corner)
- Maintain vacuum as fluid continues to flow
- Watch carefully for air bubbles in the extracted fluid
- Continue until you see a steady stream with no air bubbles for at least 30 seconds
- If air bubbles persist, close the bleeder, release vacuum, and repeat
- Visual Indicator of Success: When fluid runs consistently clear without bubbles, that corner is properly bled
5. Proper Closure (1 minute per corner)
- Before releasing vacuum or removing the adapter, close the bleeder screw
- This prevents air from being drawn back into the system
- Remove the vacuum tool only after closing the bleeder
- Proceed to the next corner following proper bleeding sequence
- Check and refill master cylinder between corners
6. Brake Testing (5 minutes)
- After all corners are bled, reinstall wheels
- Lower vehicle from jack stands
- Test brake pedal feel before starting engine
- Start engine and test brake pedal again (power assist will change feel)
- Visual Indicator of Success: Pedal should be firm with minimal travel before resistance
Common Problems and Solutions:
- Cannot achieve vacuum: Check for leaks in your vacuum tool or connections.
- Fluid not flowing: Bleeder screw may be clogged or not opened sufficiently.
- Air bubbles continually appearing: System may have a leak or severe air intrusion requiring professional attention.
Visual Indicators of Successful ABS Bleeding
Fluid Appearance:
- Starting fluid: May be dark, cloudy, or contain visible particles
- Successfully bled fluid: Consistently clear, transparent, with proper color for your fluid type (amber for DOT 3/4, purple for DOT 5, etc.)
- Air bubbles: Initially large or frequent, becoming smaller and less frequent as bleeding progresses
- Final appearance: No visible bubbles in tubing for at least 30 seconds of continuous flow
Brake Pedal Feel:
- Before bleeding: Soft, spongy, possibly sinking to floor when held
- Properly bled system: Firm resistance within 1 - 2 inches of pedal travel
- Pressure test: Pedal holds firm when pressed and held for 30+ seconds
- Engine running test: Pedal should still be firm with engine running (power assist will make initial press easier)
Warning Signs of Incomplete Bleeding:
- Pedal gradually sinks to floor when held down
- Pedal feels firm only after pumping multiple times
- Pedal feels different when engine is running versus off
- ABS warning light remains illuminated after bleeding
- Brakes feel "grabby" or inconsistent when driving
Verification Test Drive:
- Accelerate to 10 mph and apply normal braking, should be smooth and predictable
- Try a harder stop from 15 - 20 mph, pedal should remain firm
- On gravel or wet surface, try a stop firm enough to activate ABS, should feel pedal pulsation
- Listen for unusual sounds when braking
- Monitor dashboard for warning lights
Common Mistakes to Avoid
Running the Master Cylinder Dry
- What happens: Air enters the entire system, making bleeding much more difficult Prevention: Check fluid level frequently during bleeding and top off as needed
- Visual indicator: Master cylinder reservoir should never go below "MIN" line Recovery: If this occurs, you'll need to start the bleeding process over from the beginning
Incorrect Bleeding Order
- What happens: Air gets pushed from one wheel to another instead of being expelled Prevention: Always follow the manufacturer's specified bleeding sequence (typically furthest to nearest from master cylinder)
- Visual indicator: You'll see air bubbles reappear in wheels you thought were already bled Recovery: Start over from the beginning of the sequence
Allowing Air Reentry
- What happens: Closing bleeder after releasing brake pedal pulls air back into system Prevention: Always close bleeder before releasing pedal pressure or vacuum
- Visual indicator: Air bubbles visible when you restart bleeding process Recovery: Continue bleeding until all reintroduced air is removed
Insufficient Bleeding Time
- What happens: Air remains trapped in complex passages or ABS valves Prevention: Be patient, especially with gravity bleeding (allow 15-30 minutes per corner)
- Visual indicator: Pedal still feels soft after initial bleeding attempt Recovery: Repeat bleeding process or try a different method
Using Contaminated Fluid
- What happens: Moisture or debris in fluid can damage seals and components Prevention: Use only fresh, unopened fluid of the correct type for your vehicle
- Visual indicator: Fluid should be clear with consistent color, not cloudy or dark Recovery: Flush system completely with fresh fluid
Final Safety Check
- Fluid level verification: Master cylinder should be at "MAX" line with cap securely fastened
- Leak check: Inspect all brake lines, fittings, calipers, and wheel cylinders for fluid leaks
- Torque verification: Ensure all bleeder screws are properly tightened
- Wheel remount: If wheels were removed, torque lug nuts to specification in proper sequence
- Pedal pressure test: Engine off, press pedal firmly for 30 seconds; should maintain pressure
Road test sequence:
- Low speed stops in safe area
- Higher speed normal stops
- Emergency stop practice in safe location
- Pay attention to stopping distance, pedal feel, and ABS function
Comments (0)
Please login to join the discussion
Be the first to comment on this article!
Share your thoughts and start the discussion